
The first time I clamped eyes on our 1970s house’s family bathroom, I laughed. The tiles were festooned with tiny blue and white flowers – everywhere! When I opened the vanity cupboard doors, I saw that the nice old guy who had owned our house before us had even gone to the effort of keeping up the theme, and he had put covered the base of the vanity cupboards with blue and white flowered contact paper. Awww.
The tiles made me smile, but from the start I thought one day, those blue and white daisies have to go. But now here’s the thing – they have grown on me. (Seriously, pun unintended).

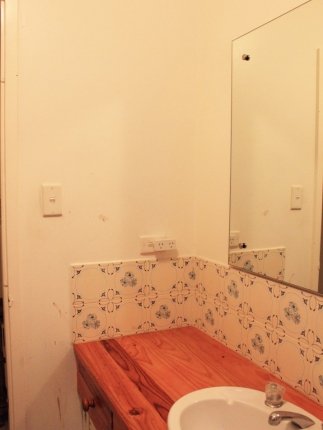
ABOVE - a definite "before" photo! Our 1970s bathroom as it is today. Although my hairbrush holder is now different. Realising in horror that I had used the Saddle Club bucket my mum gave me for more than six shameful years 'waiting til we renovated the whole bathroom to replace it', I replaced it with an IKEA Fintorp bucket.
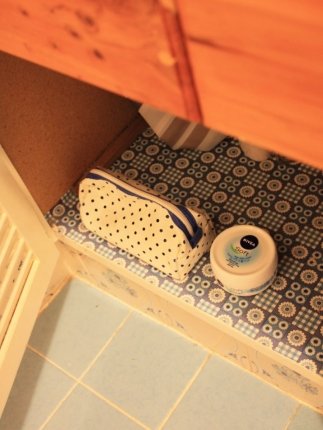
ABOVE LEFT: Attention to detail when it comes to the daisy theme.
I kind of like the tiles now. I think I would be sad to smash them out. They may not be the coolest tiles around, but they are so happy, and they just suit our very unpretentious 1970s house. Maybe it’s true what comes around goes around, because now I think those 1970s tiles actually could look kind of good again.
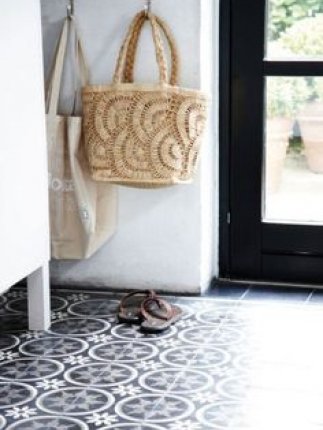
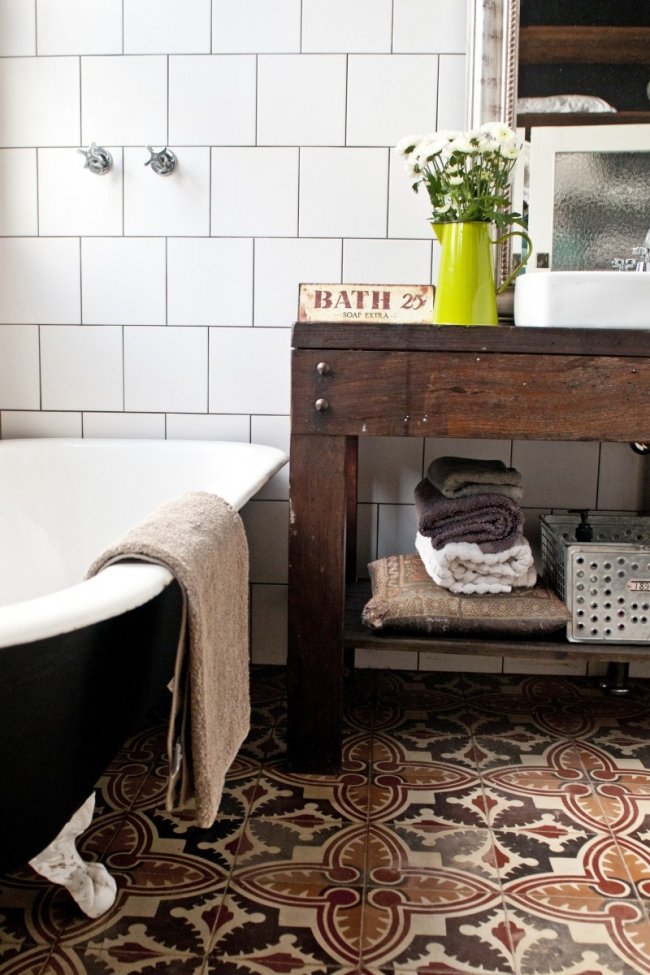
If you think we’re a little bit crazy for wanting to keep them, that’s okay. But these tiles are the closest thing we have in our house to encaustic tile, which is one of my greatest loves in interiors. Take a look at these beauties.
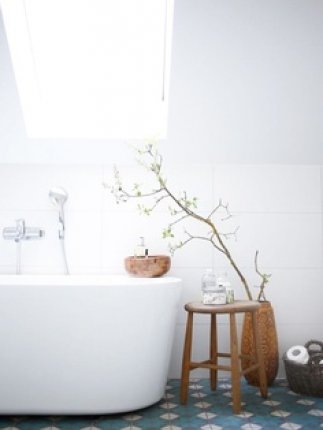
ABOVE LEFT: Photo from Lovely Life. ABOVE RIGHT: Source unknown.
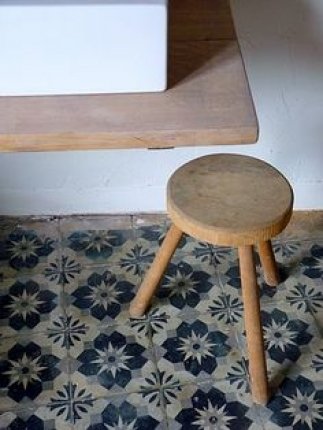
ABOVE LEFT: Gorgeous encaustic tile photo from Seventeen Doors. RIGHT: Source unknown.
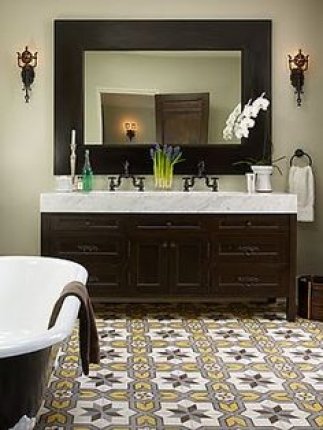
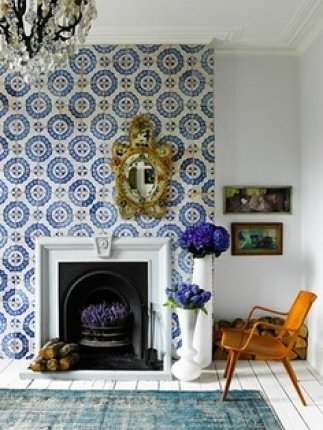
ABOVE: Photos from Carla Aston.
ABOVE: Do you remember when I wrote about Carla's incredible recycled house? In her bathroom were beautiful vintage Spanish floor tiles. Styling and photo: Meghan Plowman of The Orchard.
I love that encaustic tile is making such a comeback. And I love that after so many years of interiors sticking solely to neutrals and blands and smooths and borings we are now really heading back into colours and textures and patterns and good old quirk. Yay to finishes with personality! I know why people say stick to neutrals, because “they don’t date” and “you don’t get sick of it.” But good colour and pattern can make you feel so energised when you walk in a room. And you can get sick of plain and simple, too. And encaustic tiles can just be so pretty…
So, we’re going to renovate and rejuvenate this bathroom, but with the aim of keeping the crazy blue and white flowers . In terms of looks and how we do it, this bathroom is going to be a big step away from the way we renovated our tiny ensuite, where we completely gutted the room, bought and installed all new things and went for a very contemporary, clean-lined, pared-back look.
With this bathroom, we’ll be approaching the renovation very differently and instead trying to keep the work and construction mess to a minimum, reusing as much of what we already have as possible and going for a deliberately more yesteryear look with a few contemporary accents. (I read a Better Homes & Gardens story that called this style "Refined Rustic").
We’ll also be sticking to a smaller budget. I’m convinced we can do everything including labor for $3,000. Mr Nerd says I am dreaming.
We'll be keeping but changing some elements, like the vanity unit (although the orange pine benchtop needs a makeover) and the chunky jarrah towel rail (the old man who lived here before made it himself and we like it).
I’m convinced that this daggy little bathroom can actually look pretty damn good. I’ve grown to like the vanity unit that I once hated (and I love its louvred doors, although the orange pine benchtop needs a makeover) and we like the jarrah towel rail, which was made by hand by the old man who lived here before us.
But the main problem with the space is, like in our ensuite, the gap between the vanity unit and the glass shower pane, which is a haven for dirt and dust and looks disgusting, so we need to remove the vanity and build a hob there.
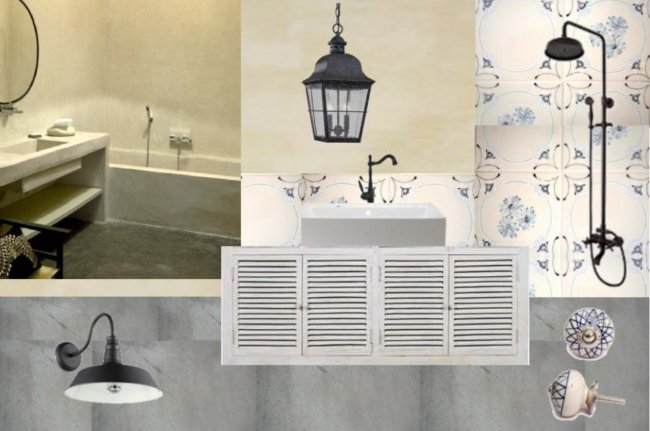
Our lovely interior designer friend Nelly Reffet backs us 100 percent when it comes to the keeping of the tiles and came up with an attack plan for the bathroom. Here are some of her great ideas for redoing the bathroom on a budget - and her awesome mood board for the space, above, that helps to give a feel for the finished room.
- Remove the vanity unit and build a hob.
- Exchange the shower curtain for a glass screen and door.
- Shorten the vanity to fit in with the new hob. In the third space under the benchtop, replace the drawer and cupboard with a shelf or two and use the space as open shelving, storing products in cute tin boxes or white wicker baskets.
- Whitewash the pine vanity benchtop to achieve a light grey finish.
- Retile the floor with grey tile (I’d love grey travertine).
- Frame the mirror with whitewashed timber.
- Paint walls with a faux limewash, aged wall effect.
- Install an above-counter white ceramic basin.
- Change dated, broken tapware (and replace broken showerhead!)
- Change the vanity knobs.
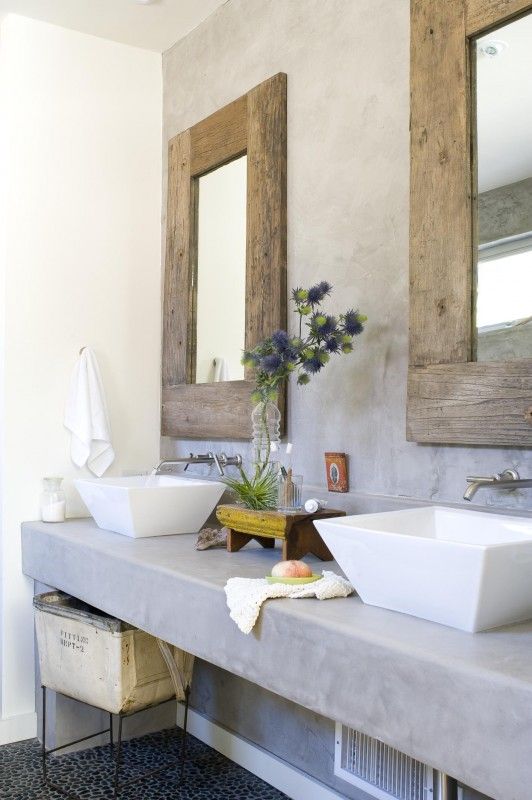
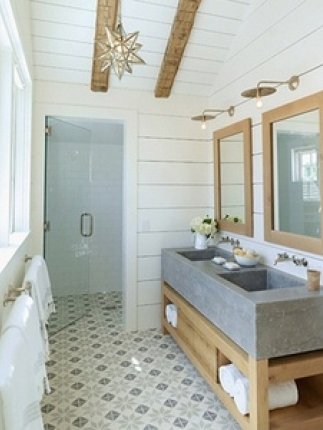
Nelly found this gorgeous photo which will be used for our bathroom renovation inspiration. Photo from Better Homes & Gardens.
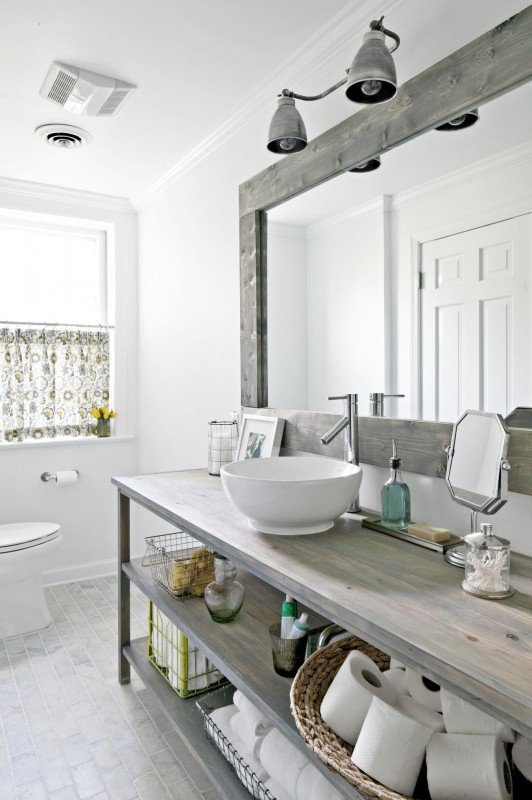
And bathroom inspiration pic number two from Better Homes & Gardens.
This week I started the first step of the bathroom makeover – fixing the horrible peeling, flaking ceiling! Honestly, I put this task off for months, which really pissed off Mr Nerd.
But fixing flaking ceilings is surprisingly painless and now that it is done it makes me feel so happy and light and fresh, like I have just had a haircut, which I have but that’s not my point.
Once after our living room and dining ceilings started flaking and peeling from storm damage we had two very jovial men who came out here to fix and repaint all the ceilings, and they told me just how to do it myself and it’s so easy to do it yourself. Here's how to do it.
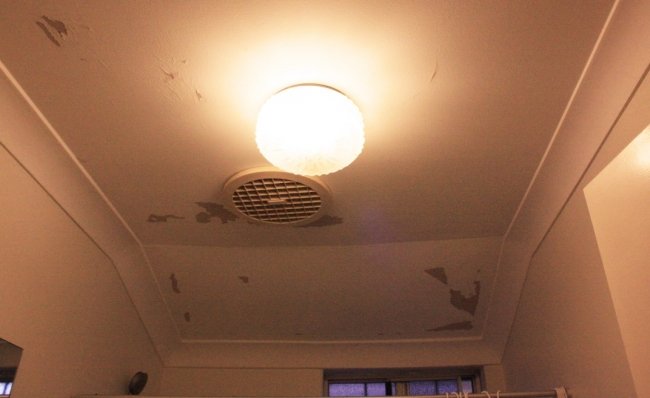
BEFORE
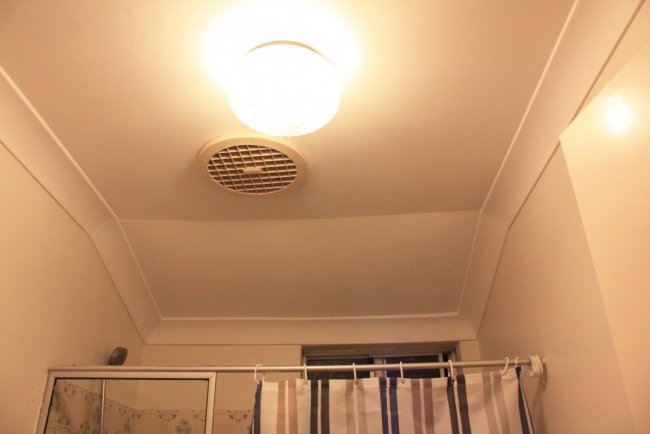
AFTER. And now the bathroom looks beautiful! Okay so there's still a lot of work to go (the giant ashtray ceiling light scares me) but that's step one of our reno done.
HOW TO FIX PEELING, FLAKING CEILINGS – A BASIC GUIDE
You’ll need:
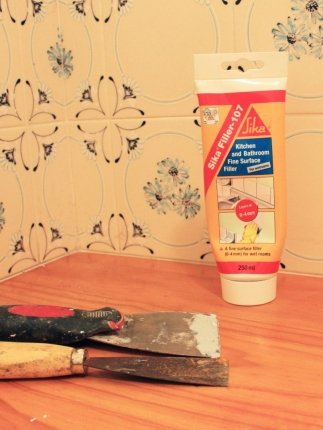
A scraper.
A fine surface filler product, such as Sika Kitchen and Bathroom Fine Surface Filler. If you are doing a wetroom, make sure you get a product that is made specifically for rooms that experience a lot of moisture.
White ceiling paint. Don’t use regular paint, it will drip all over you and you will look like Linda or Pete from that scary Round the Twist episode with the seagulls. Ceiling paints are made to drip and spatter a ton less. Try Dulux ONCE Ceiling in its flat finish or Dulux Wash & Wear Ceiling for Kitchen & Bathroom.
A roller and tray.
A paintbrush for corners and edges.
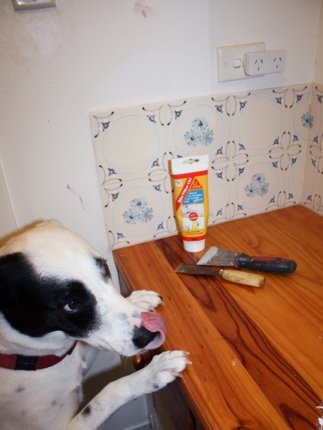
ABOVE: Your ceiling-fixing tools, and Nala eyeing off the Sika Fine Surface Filler. Those creepy brown marks on the wall? They are from the time I decided to dye my hair and I don’t know, whip my hair back and forth. They won’t come off. We will overpaint.
How to do it:
- Scrape all of the loose flaking paint off. As much as you can get.
- Making sure the surface is now clean, using a scraper or trowel, apply thin layers (0 to 4mm in thickness) of the Sika filler to fill out the patches. Try to get it as smooth as you can using the spatula, but don’t stress if it’s not absolutely perfectly smooth because you’ll sand it in the next step.
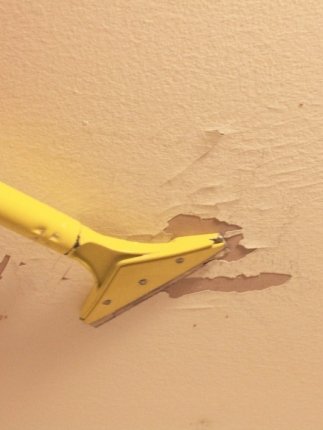
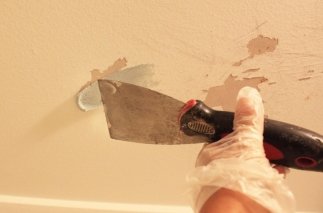
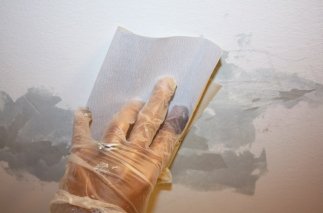
ABOVE: The easy preparation steps: scrape, fill, sand. Then paint. Now stop laughing at my photos. YOU try balancing on a stepladder, sanding a ceiling and taking a photo at the same time while not falling over onto your scraper and accidentally cutting out your kidney.
- After four hours, the surface should be dry. Sand gently to gently abrade the surface while smoothing out any bumps.
- You can now paint! A roller will give the most perfect finish, but I used a brush as it was such a small surface area and I'm lazy, and it looked good.

Keep tuned for the next steps in our budget bathroom renovation! Maya x


