
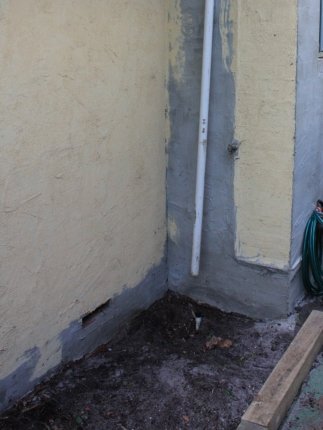
So remember when I told you that we were going to be making over our creepy and embarrassing side garden? Well we have now finished - and it looks tons better! Not that it could’ve have looked much worse, really. Remember the before? Rundown, quarter-finished, sad wheelbarrow garden bed fail. It looked like the creepy house that's on the news when there’s been a homicide.
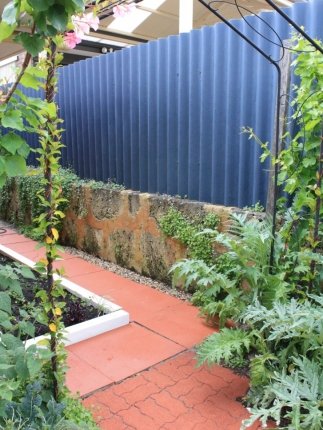
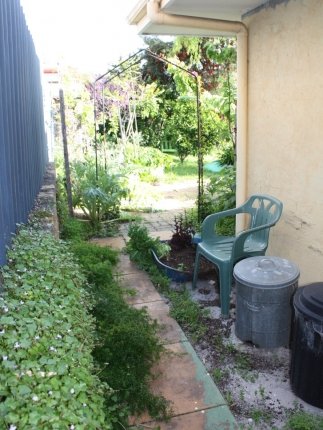
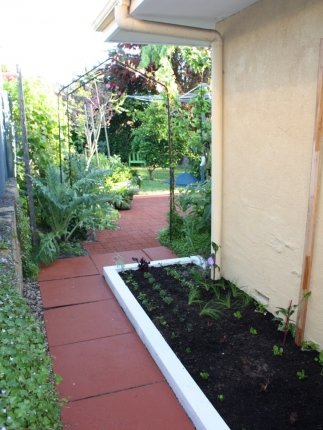
Now we've turned a disused part of our garden into a useful vegetable garden with a passionfruit vine - and it also looks much more cheerful and less murder house-y!

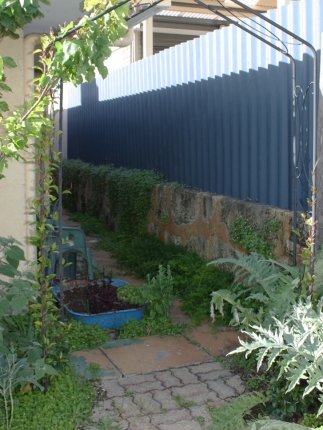
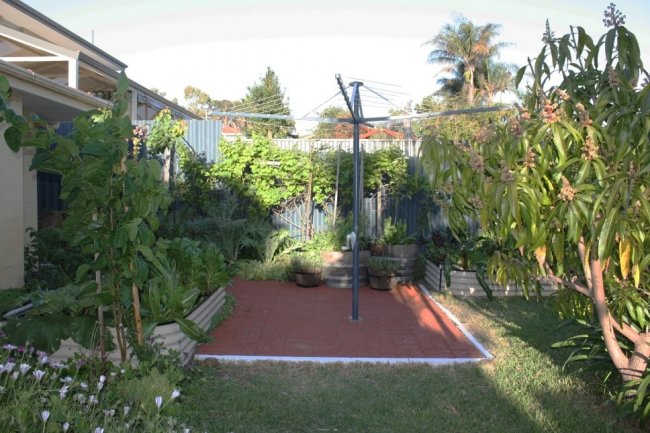
BEFORE: Our broken '80s Hills Hoist that didn't hoist.
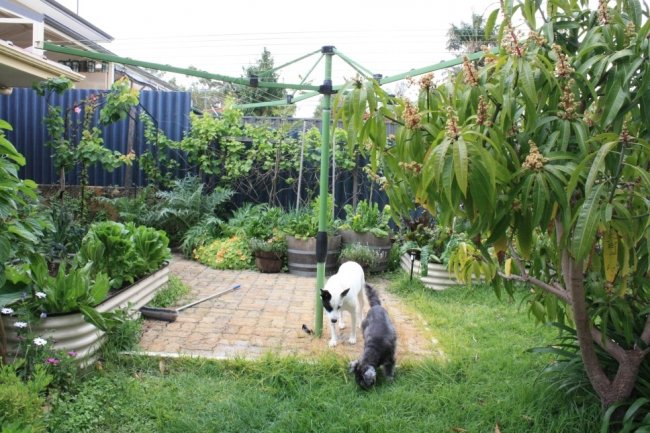
AFTER: Our nice new Hills 47m Rotary 7 hoist for $249. We picked their dark blue colour to tie in with our fence.

When Masters Home Improvement sent me an email to ask was there a part of our house or garden that needed a makeover (um, just one part? Please, which part would you like?) and if so would we like to give it a crack with a $500 Masters gift voucher? Um, yes. SHOPPING SPREEEE.

Mr Nerd and I narrowed down our project choices to freshening up our tired-looking veggie patch and replacing the crappy old broken Hills Hoist that didn’t hoist. We would also clean up the creepy side garden and this is when Mr Nerd had his lightbulb idea - to hook up our evaporative air-conditioning dispense water so that it watered a new vegetable garden bed using an underground irrigation system.
It's all well and good to have great ideas... but doing them is harder. And the hardest part of this job was convincing my new husband, who really should be in 'happy-wife-happy-life' mode considering he had just gotten married, to do slave labour on his week off. It was extra hard because Grand Theft Auto V had just come out.

THE HARDEST TASK: Begging Mr Nerd to do the slave labour. There comes a sad time in your life when going, "Pleeeeeazzze. I'll be your best frieeeeennnd" just doesn't cut it anymore and you need to resort to grovelling, bribery, screaming and spousal abuse.
I had to GROVEL, nerds. Even Nala looked at me like, "God Maya stop it. You're embarrassing yourself".
Grovelling over, I used the Masters online store guide to look at what things we should get. Masters have a great click & collect system where you can browse online, order and just go in and pick up your things. But I love to browse a shop and dawdle over displays so after a bit of online looking, we jumped in Mr Nerd's FJ and headed off to our local store. For those of you who know how I suffer in the air-con less FJ, it was not a hot day, and it was only a five minute drive, so I survived the journey. Thank you for your concern.
PUTTING IN THE NEW HILLS HOIST
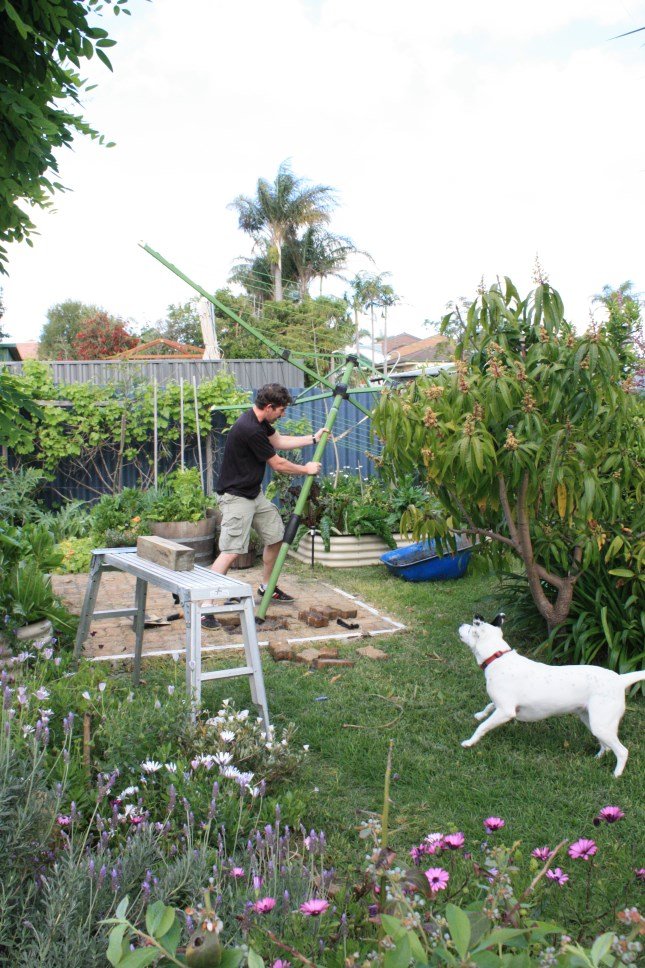
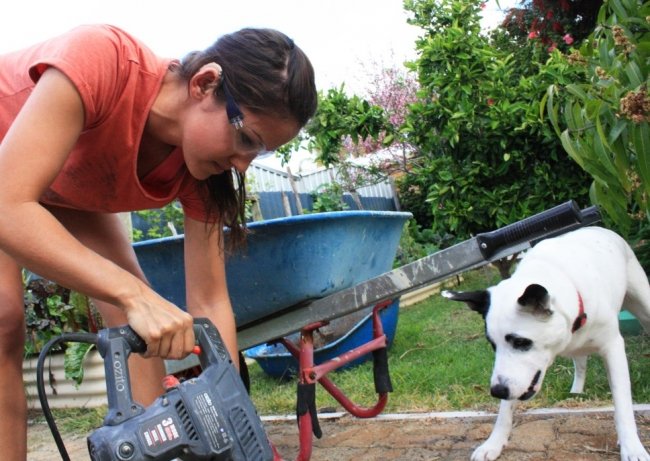
Why do dogs always go apeshit whenever you do something slightly noisy? Nala shouts at Mr Nerd every time he starts the lawn mower, chops wood or even sneezes. When Mr Nerd cracked out our crappy old Hills Hoist Nala jumped around barking like a lunatic at him. It took several goes and lots of barking to get it out.

JUST ADD WATER: Pouring cement into the hole. ABOVE RIGHT: The washing line before. And Nala going bonkers.
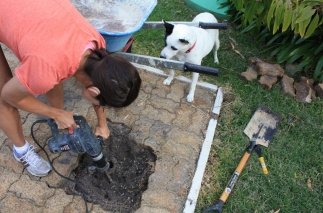
We decided to move the new washing line over a bit as in its current spot it was hitting our little mango tree and knocking off our baby mangoes before they had a chance to ripen. First I had to grind down the old concrete stump so we could re-pave over the top. Again Nala went mental. I think she loves renovating.
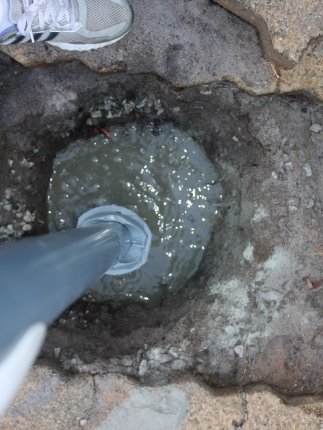
It was surprisingly easy to put the new washing line in! If I had known how easy and affordable this would be, we would have done it earlier! We dug a hole, stuck the new line in and made sure it was level. To set the new line in place, we used two 20kg bags of Cement Australia Rapid Set Concrete. All you have to do is pour it into the hole, add water and then fight over who has to stand there holding the washing line in place while it sets.
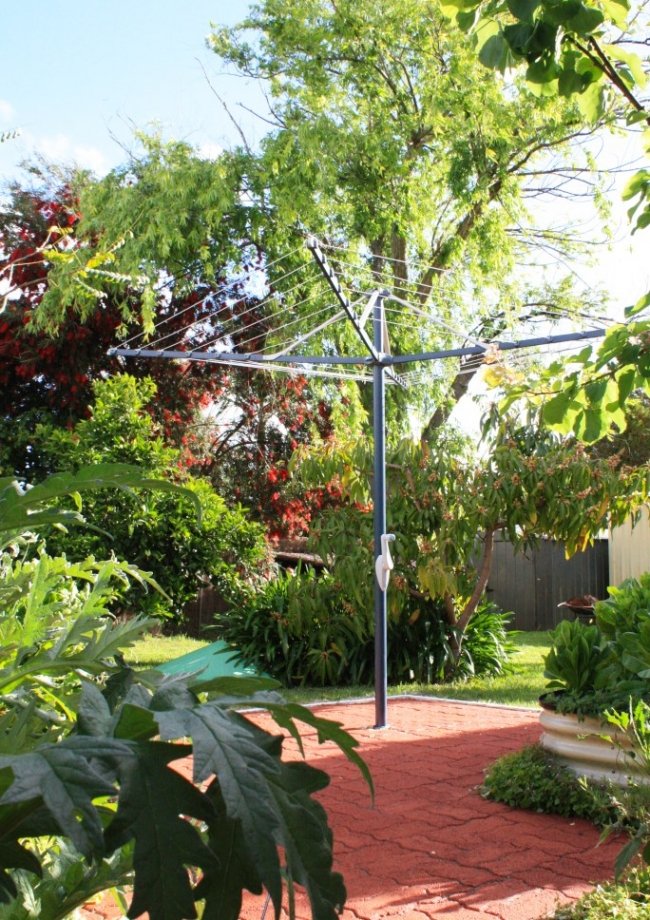
PARTY LINE: We bought a new Hills Rotary 7 Hoist clothesline and I love it as much as you can love a washing line! If you have a small yard it is a good washing line to put in, because you can take it out of its slot easily, fold it up and put it away so you can use your paved area for entertaining and tea parties. (Mr Nerd says we are never having a tea party).
USING THE EVAPORATIVE AIR-CON RUN-OFF
In my first post about our creepy side garden I mentioned my surprise when Mr Nerd had a lightbulb moment – to use the dispense water from our evaporative air-conditioning system to irrigate a new vegetable bed. We set it up so the system was beneath the surface rather than dripping on the surface of the soil, to reduce the amount of water that would evaporate on hot days.
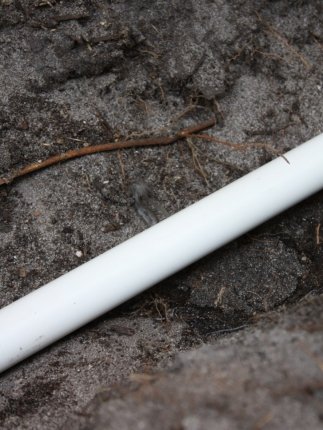
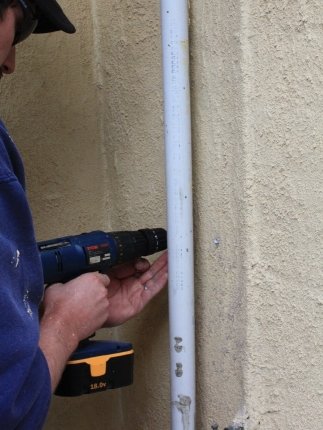
I say ‘system’ but that’s a fancy word – what we set up was very straightforward, simple and easy to do! Mr Nerd bought lengths of white plastic pipe, drilled 2mm holes into it at intervals and connected it to the dispense water pipe, laying it along the trench we dug. Before we put stones around the pipe and shoveled dirt over the top, we gave it a trial run and turned the air-conditioning on for ten minutes.
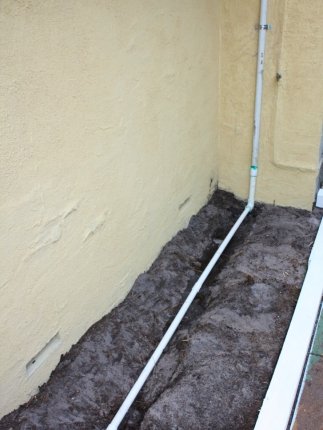
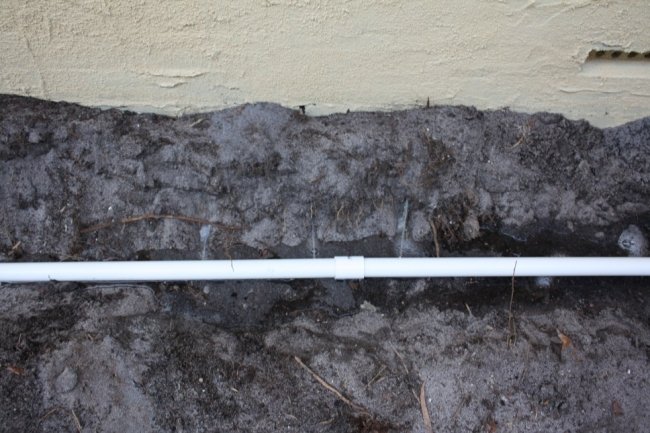
We could not believe how much water came out after such a short time! It’s good to know that now all that water that would ordinarily have gone to waste will be going to watering food we’ll eat. Please picture me saying that in an annoying smug fashion, like Jennifer Aniston boasting about her three minute showers. (And pffffft. How can anyone get clean in three minutes? She clearly renovates NOTHING).
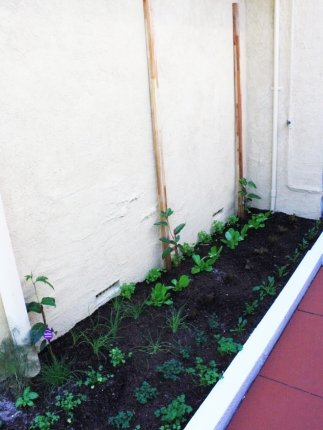
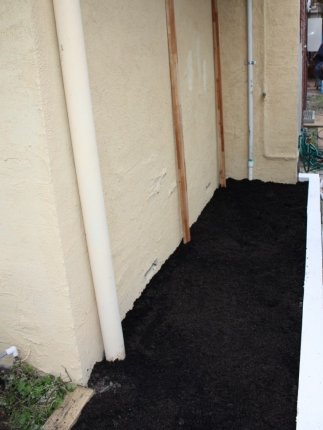
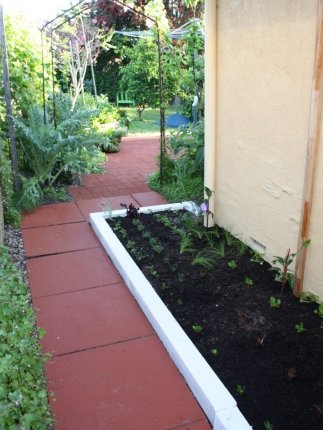
MAKING THE NEW BED
The creepy wheelbarrow planter bed was taken to the tip and the ‘compost bins’ I found on the side of the road were relocated (eventually we will invest in a real compost bin!) This gave us a nice big space for our new garden bed.
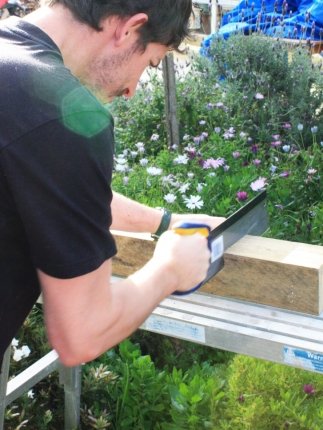
We built the new bed using treated pine sleepers from Masters that we painted white
and filled it with soil and sheep and cow manure. Because there was nothing growing in that spot, I didn’t worry about putting in any weed prevention. But if I was creating a garden bed in a position that was weed-prone, I would have laid thick layers of soggy newspaper at the bottom to kill off the old weeds first – and then chucked in my soil.
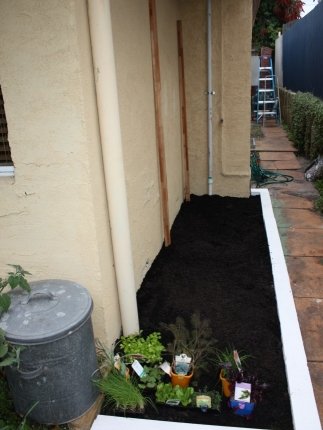

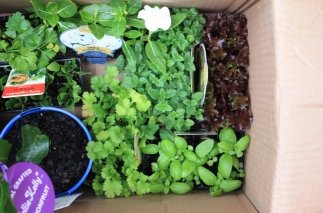
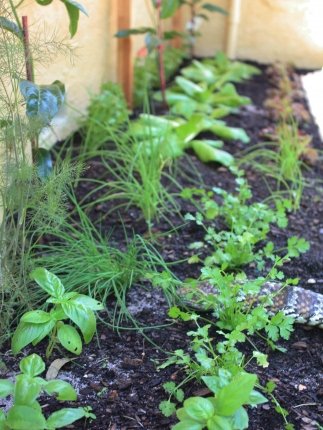
PLANTING PRODUCE
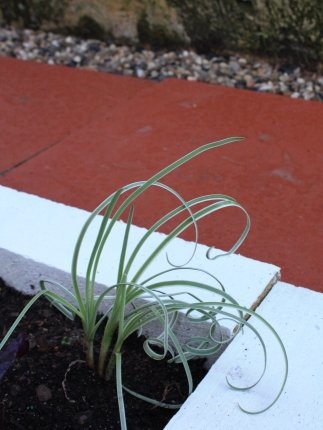
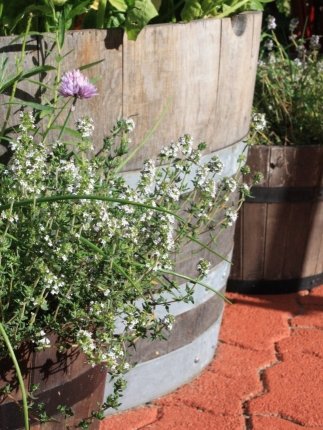
I planted in vegetables and herbs that I thought would thrive in a partly shaded position – lettuce, spinach, oregano, basil, beetroot leaf, thyme, chives, spring onion, fennel, coriander, parsley. So far everything has grown. Woohoo!
We hammered in stakes for the passionfruit an all that’s left for Mr Nerd to do is put up a trellis or wires for them to grow across. My friend Amanda told me passionfruit grows super-fast – she planted hers just a year ago and it looks like it is already going to fruit this year! And it is true. Already ours have grown and it’s only been about ten days!

Is it safe to use greywater and rainwater?
WEEDING! (Thanks Dad)
My lovely dad came round to help me weed the side garden, which was a mammoth job in itself! He got rid of this nasty prickly plant that grew along the fence. It was so prickly it caught at your ankles with its little spines every time you walked down the path so you had to try to hop around it. Glad to see the end of that plant! We sprayed its root remants with weed killer and filled in the gap with beautiful riverstones.
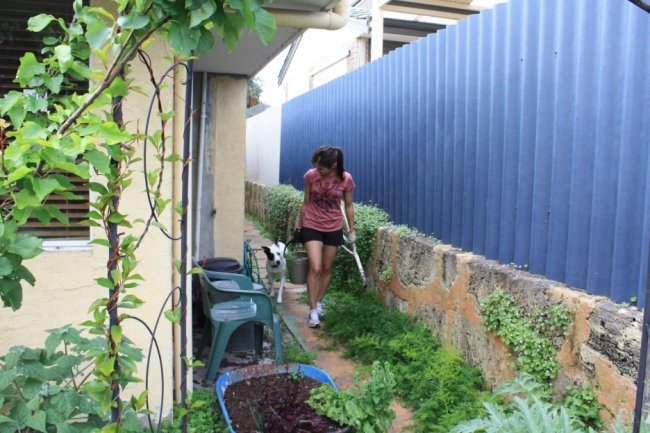
Goodbye weeds! The prickly plant.
PAINTING... THE PAVING
Not wanting the hassle of repaving and wanting to keep our makeover costs down, we decided to rejuvenate our existing pavers instead of putting in new ones. So we used concrete paint to paint the old 50s council pavers by the side of the house.
You know how when you paint something and it looks so good it makes everything around it look worn out and crap? After we painted the pavers we came to the dated 1980s brick pavers around the washing line and Mr Nerd suggested painting them, too. I know, painting brick is meant to be a big no-no isn’t it? We were torn. Do we paint it? Leave it?
In the end I high-kicked the air, made an impressive karate noise and attacked the pavers with paint. Or I might have just started painting quietly.
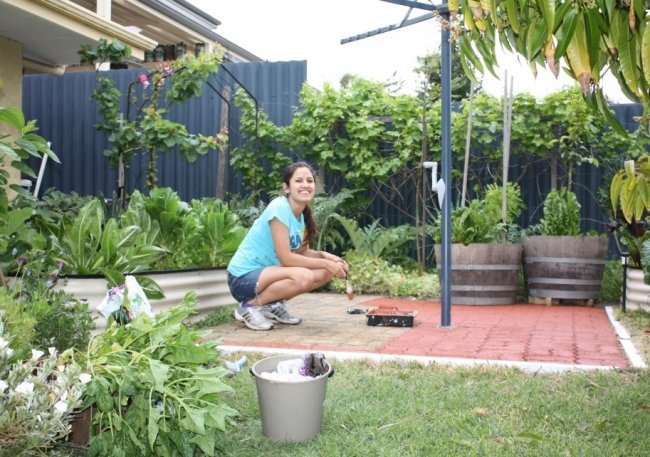
And… we love the finished result! It might not be to everyone’s taste, but I think it makes the old pavers look fresh and it looks so cheerful somehow. And the terracotta-green-white colour scheme reminds me of Oompa Loompas. I like Oompa Loompas.

FINISHING THE RENDER & PAINTING THE FENCE
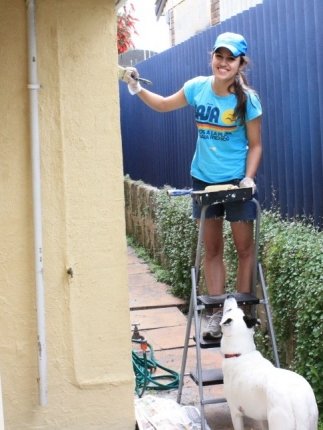
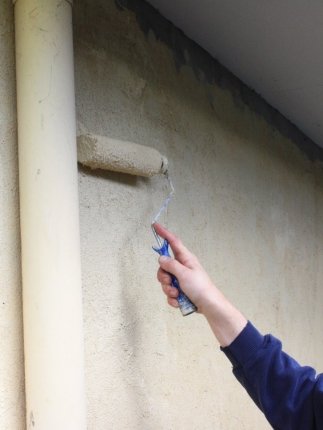
We finished rendering the external wall house with textured paint render and painting the fence with low sheen exterior paint.
AS A FINISHING TOUCH OR TWO...
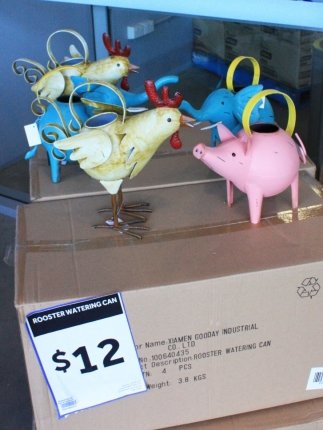
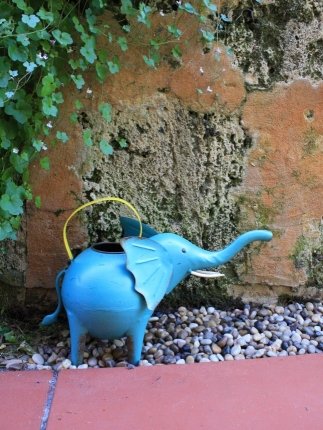
After we had finished, I painted the lid of the bore which was a horrible faded green colour before. When Mr Nerd saw I had done it he was like, “Why did you paint the bore? I didn’t even notice it before. Now it looks like there’s a tiny circus tent in our yard.” I said that then our circus tent went well with our... new elephant watering can!! Isn’t it cute? I snuck it into our shopping trolley at Masters when Mr Nerd wasn’t looking. Only $12!
AND IT’S DONE!
We’re not the only ones who love the side garden now - I’ve gone out there so many times now and spotted the blue tongue lizards hanging out there, hopefully eating the slaters off our new vegies. Go Blue Tongue Pest Control. Bianca the blue tongue is very shy and runs off to hide when she sees me. Brian on the other hand is fearless. He even goes to our front door sometimes and patiently stares inside hoping I’ll come out and feed him. Which I do. I can’t resist his cute face. Although the time I found him in our bedroom (we still have NO IDEA how he got in there) his cute face scared the crap out of me.


ABOVE: Yes, we had a 'CAREFUL WET PAINT' incident, as you might be able to tell from Nala's paw. Mr Nerd was annoying me so I told Nala to "get him"... she ran through the wet pavement paint to chase him through the house. Oops. Didn't think that one through.
Now that the evenings are so beautiful and summer-like we’re looking forward to hanging outside in the garden more. Don’t you love it when you finally just ‘do’ something you’ve been putting off for ages.... it makes me feel so energised and happy and pleased with myself. Hope you guys are enjoying the gorgeous spring weather! Maya x
You can find your nearest Masters on their website or check out their Facebook page at or follow them onTwitter for great home improvement tips and inspiration. Masters also have some fab DIY how-to videos on YouTube. I received sponsorship from Masters for this project.


