Not everything about writing a blog is fun and roses. But one of the things I love most about blogging being a part of my life is that it gives me so many kicks up the butt – deadlines and incentives to finally get my act together and do something.
I need these kicks up the butt, guys! Otherwise I would never make decisions and actually get things done. And this couldn’t be more true of Little Miss Nerd’s nursery makeover.


As a nursery it was unfinished and it had been bugging me for AGES. Literally every time I walked in I felt bleh. You know when something broken or just-not-done brings your energy down? I would feel irritated with myself for not having made the time to tackle it yet.
Her nursery used to look like this, after I had fixed it up and made it a craft room.

This is nice. This I liked! (Before that it was our junk room, our dumping ground – you can see those photos in this post before I fixed it up and made it a craft room) My budget craft room makeover! It was even in a magazine.
Then it became a guest bedroom for a while (it was so small it barely fit our old double bed) and then it became Little Miss Nerd’s bedroom after she moved from her bassinet in our bedroom to her cot in here, and then it sort of became a junk room all over again.
All these things that didn’t have real homes kind of migrated to this bedroom. And I’d never decorated it properly with a colour scheme and styling and everything. I’d never decided what to actually do. I’ve talked about this before when I shared Little Nerd’s toddler bedroom reveal, but the thing about our 1970s house is that the bedrooms are SMALL. And Miss Nerd’s nursery is the smallest – it’s 265cm x 265cm – it’s a small and dark room and not super-inspiring. We had nice things – the painting on the wall, the cot, the little toys and bits and pieces, but I’d never tied them altogether properly.
Miss Nerd was nine months old and I was literally always thinking, “I REALLY have to decorate her room properly,” when I got the perfect excuse to finally do it. A publicist for Channel 7’s House Rules contacted me and asked if I would like to do a budget room makeover on my Instagram and share it to celebrate the new season. Of course I was keen – it was the motivation I needed to finally tackle her nursery makeover properly.
The aim was a $250 budget and I was actually excited about having a tight deadline. Maybe it’s the journalist in me that always needs a deadline.
And then, a weekend of solid work, and the room was finished. Have a look.


It is done! Done feels SO GOOD, I wish I’d done it earlier! Sometimes I deliberate all sorts of design decisions for AGES. This time I tried to trust my gut and just do things like choosing a paint colour and place art without second-guessing (and third-guessing, and fourth-guessing) my decisions and I surprised myself because I am actually really happy with it. Sometimes ‘done’ is better than perfect, right? (Something I constantly need to remind myself).
The bit that I’m most proud of is my DIY wall beading/cornicing/railing/trim/picture line (a few people asked me what I would call it and I’m actually not sure what the best term is).
Regardless of what it should be called, what I wanted to add to this room was some wall colour and some character. I was thinking if I did one solid feature wall, it might overwhelm the room and make it feel more closed-in. Adding some beading seemed like a nice way to add some wall detailing and a paint colour without sort of overpowering what is a really small space. I bought the trim from Bunnings – from memory it was about $13 a length.
")
")
It’s so simple but it’s quite pretty. What I’m proud about is that I did it myself. Mr Nerd was on a work trip, and I did the room in a weekend on my own. Okay not entirely, Little Nerd helped me measure and cut the beading (but then again, he is three, haha) and my Mum helped me glue it up so it was level, but still, I’m proud of my DIY trim!
")
")

You have to cut the beading at angles to get it to sit right around the corners and the windows, and I used to have this amazing Dremel which would have been PERFECT for cutting the beading at an angle, but then my charming sister borrowed it and left it in her car and someone broke in and stole it. So annoying.
So, I literally sawed all these pieces with a hand-saw. That wasn’t so easy. I’m sure all my carpenter readers are looking at my DIY beading in these photos dry-retching in their mouths as we speak, but I am so proud of it. Like I did it and I just wanted to keep walking into the room afterwards to look at it gleefully.


It’s probably because I am NOT the most practical person. I am inventive, not practical. Once me and my sister, the one who lost my Dremel, hung shelves in my toilet by drilling holes into the double brick walls with a cordless drill driver, because we couldn’t find the hammer drill that my husband had probably hidden from me somewhere. “It will be fine,” Simone said. (Surprisingly it actually was, even though it took about two million hours, I even wrote a DIY on it). See? Creative. Not practical.
But yes. What I wanted to say about this little DIY was, if I can do this, you DEFINITELY can. Have a crack. If you use a piece of beading with a more rounded profile, you have to cut the ends to get them to sit flush, then sand them, then I used putty to fill in any gaps and painted those with a tiny brush.
 DIY WALL MOULDING TIPS
- Measure the line from the ceiling, not from the floor.
- Paint the walls before you affix the trim, not after. Then your trim will cover any slightly wonky bits and make it look smart.
- Paint the beading before you affix it rather than after – way easier. I used white Annie Sloan Chalk Paint.
- If you have low ceilings, consider making the line higher up rather than lower. I would actually have raised the picture line up a little higher than where it is, because this is a tiny room with low ceilings, and that would visually make the ceiling seem a little taller. However, when I removed the old IKEA picture ledge, it left two unsightly holes that still didn’t look right even when I puttied over them, so I used the trim to cover them.
- Being slim and pine, my beading was lightweight enough to be able to be glued up (I used a Liquid Nails) but a heavier, thicker wood might have to be screwed in – take it into consideration when you choose.
- Get someone to help you glue it up so you get it level. Ideally someone who is not in kindergarten.
Initially I actually wanted to paint the walls of Miss Nerd’s nursery a sort of light duck egg blue, deep blue or blue-green. But when I looked at those colours on the walls, they just didn’t work. Because this room barely gets much sun (it’s also overshadowed quite a lot by the two-storey house next door) it already feels quite dark, and the cool colours made it seem cold and depressing. I wasn’t even thinking of pink but I was on Pinterest and saw a pretty apricot-coloured room – and then I realised a warm tone was probably the way to go.
The wall paint is Dulux Diva Rouge in half-strength. The colour is actually almost exactly like the same pinky-peachy-apricot colour my parents painted their entire rear extension in the 1990s, and as a little girl who loved blue I always swore I would never, ever paint my house that colour when I got a house, but here I am 20 years later painting my house 90s pink. Go figure.
After the walls were painted and the trim up it was time to play with pictures! For some reason artwork that might look a bit plain or shabby on a white wall somehow looks so special on a coloured wall. And when there is trim or just some sort of colour difference, it gives a nice ‘anchoring point’ for artwork. It sort of looks more pulled-together especially when your art collection is a little more random.
I had so much fun pulling out all these random bits of art that I’d collected over time from markets and op shops and then realising they looked pretty good in here. The little castle long stitch was $4 from an op shop and I thought it was so cute. (Mr Nerd calls things like this my ‘old lady art’). The pink and blue floral cross-stitch I got from a woman at the markets for $5 and I remember her saying happily, “It’s so nice to see younger people appreciate cross-stitch, no-one likes it anymore.” (Mr Nerd probably would have said, ‘that’s true’ had he been there). The castle cross stitch was $4 from a Good Sammy’s.
The oil flower painting was $4 from a market and the Love print I got yeeears ago from a girl who had a stall outside Jessie’s years ago. I have to admit it sat in my cupboard for years, waiting to be framed and hung… does anyone else buy prints and then frames them like years later? The mobile was a cheapie from Kmart.

That huge painting by the cot I got for $10 from the Melville Markets. I love it there. I literally walked past this painting every Sunday at the markets for about five weeks and I liked how it sort of looks like a paint-by-numbers. Then one day I decided I HAD to buy it even thought I had no idea where I would put it.
Sometimes I say wide-eyed to my husband, “I would NEVER buy something from the markets if I didn’t know exactly where I’m going to put it,” but that is such a lie. I impulse buy weird things all the time and then I stick them in the cupboard where they sadly wait for a home/the day when we buy a big house ten years in the future/the day my sister comes over with the (screwdriver) drill to help hang them up.

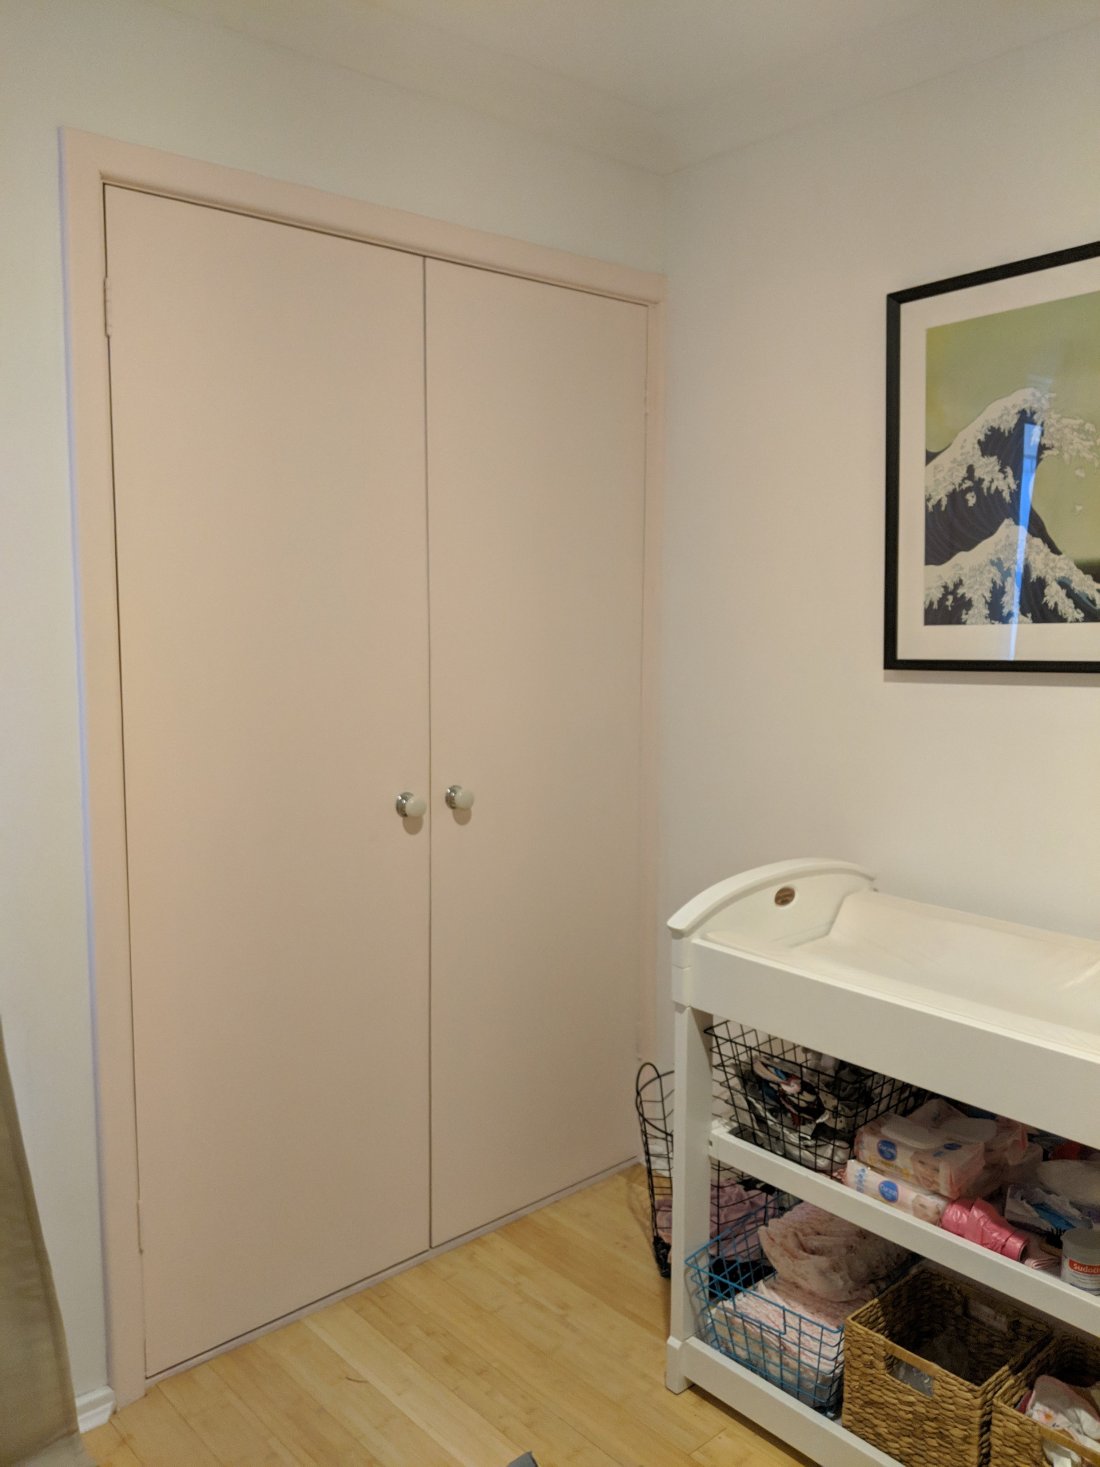
Anyway, thank God for my hoarding DNA. I was never intending to put this one in Miss Nerd’s room but somehow I think it just works. So, colour can make random art work, guys. Art walls don’t have to cost a fortune and if you like random stuff, a coloured wall can help you tie it all together. Eventually I might add a pretty patterned rug – how cute is this from Temple and Webster, for example. But for now it’s fine. I was also initially planning to paint the wardrobe doors a light blue or grey, as I thought it would be too much pink, but when the walls were painted it somehow didn’t look too bad, so I’ve left them for now.


All up, I went JUST over my $250 budget for this room. The last splash was a huge palm from Bunnings – $110, which I put outside her window to make up for the lack of garden there. That view is so crap – ugly old fence and paving. Sometimes a huge plant is just what you need. One day we’ll eventually pave that part of the yard and put some sort of more permanent (possibly potted) garden there, but the effect of having a plant there definitely visually brightens it all up for now. Palms seem to be one of those plants that fall in the love them or hate them category. My husband hates them, but he usually lets me do what I like with the garden, and did I mention he was away that weekend? It has its perks.
Then I celebrated finishing by taking a break and taking Nala for a run by the river with my sister (the other one, not the one who lost the Dremel) and we got pizza.


The best part was when I showed Little Miss Nerd. I’d done the last bits of the room, hanging the art work and the mobile and putting in the toys, while they were at my mum’s place, then picked them up and brought them home. Being just a baby, I didn’t actually know if she would notice any change to be honest, but she lit up. If you go on my InstaStories, I saved a Highlight reel of stuff called Nursery Makeover – there’s a clip where she sees the finished room. Her face cracks me up. Make sure you put the sound on so you can hear her brother harping on. He is a details man.
 And I kid you not, the day after I finished her room, I was hanging out in there with the kids (something we never did before, because it wasn’t a nice place to play in) and Miss Nerd took her first steps in her new room! We were all super excited about it and she was so proud of herself. Maybe it was her way of celebrating. (“Finally! Mama got her shit together.”) At nine months old, she started walking SO much earlier than Little Nerd did, which has been new territory for Mr Nerd and I, having an adventurous walker, but it’s also been fun. And funny. I think I could just watch babies walk all day. She reminds us of E.T).
I can’t even describe how good it felt, to FINALLY have finished a room that has been bothering me for months and months. It felt so energising. The home decorating equivalent of Marie Kondo-ing a messy kitchen cupboard. Now this room literally makes me feel lifted up each time I walk in there, but best of all the kids love it too, and they play in there (by themselves! Every morning! At their own free will! Heaven!) It’s still small, and dark, but it’s a much nicer, way more pleasant part of our home. Maya x
SUPPLIERS
Wall paint Dulux Diva Rouge half-strength
Pine wall moulding Bunnings
Bed linens Bedtonic pure linen cot sheets
Moulding paint Annie Sloan
Wall shelf IKEA
Dog wall print Mokoh Design
Wall art Thrifted


Oh Maya, little Gremlin Girl is just so precious!!!! I always smile when I see her photos. Great job on the room! I am so not into pastel colours but my bedroom (which really needs a new coat of paint) has similar lack-of-sun issue. I cannot go white as the drapes are creamy and I think white paint would make them appear dirty. The rug has pink and orange and I have been toying with the idea of pink/slightly peachy paint colour. I have to check if Diva Rouge is available here and get a tester.
The last two pics with Nala made me very happy! (I suspect you mowed that huge field all by yourself just so as to get the look of a perfectly manicured lawn).